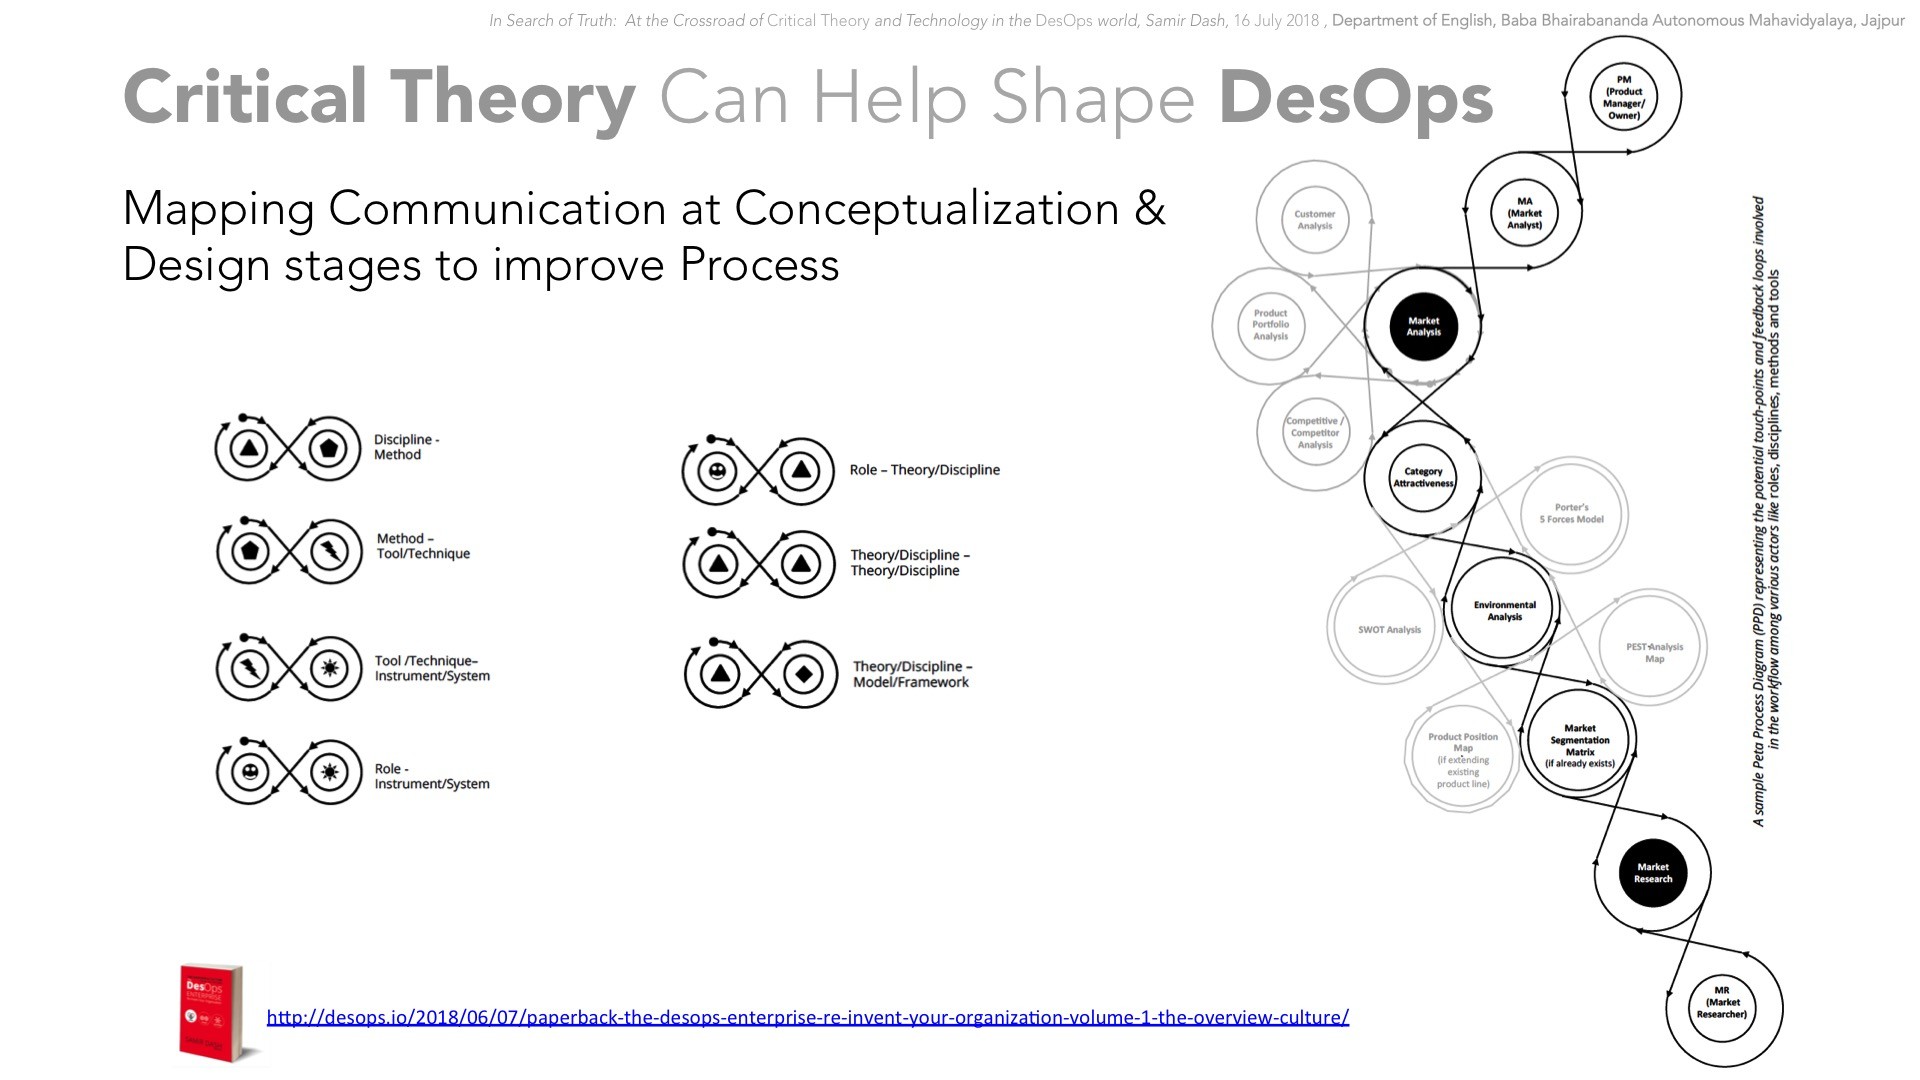
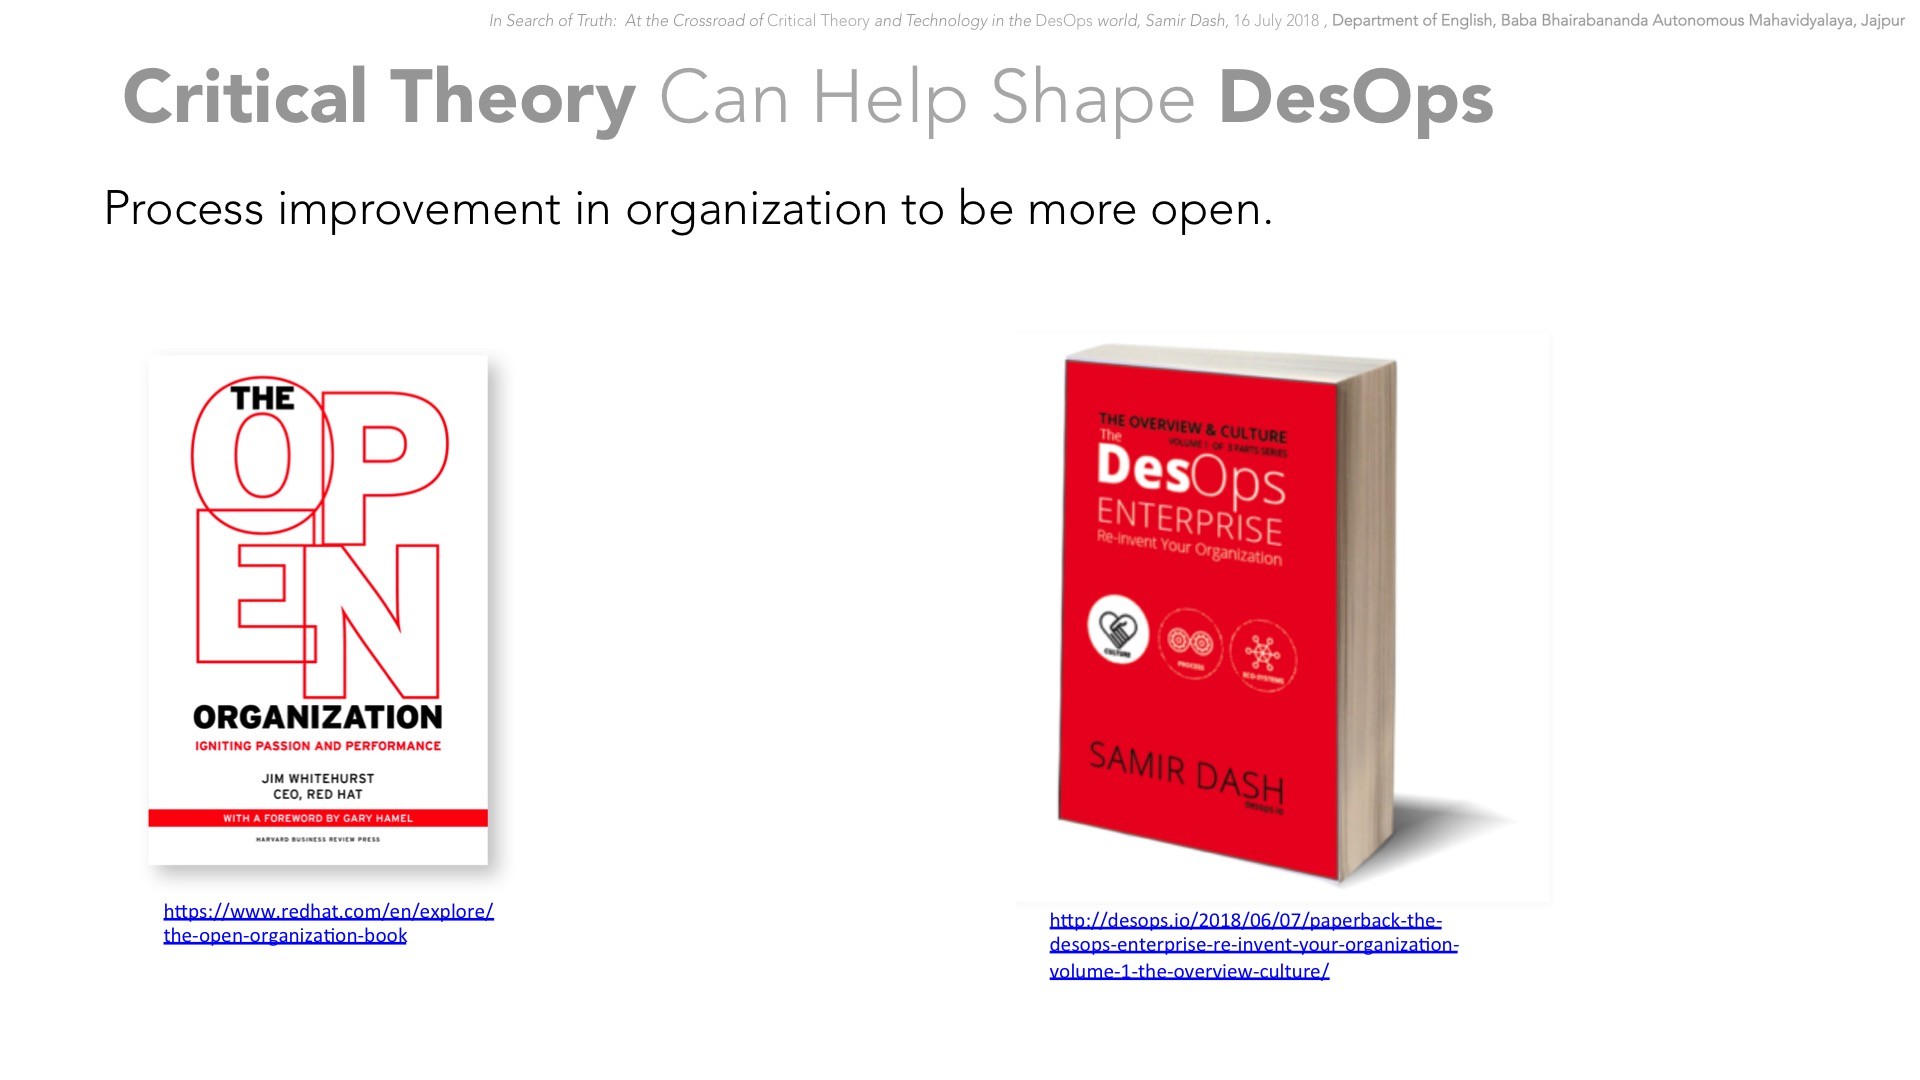
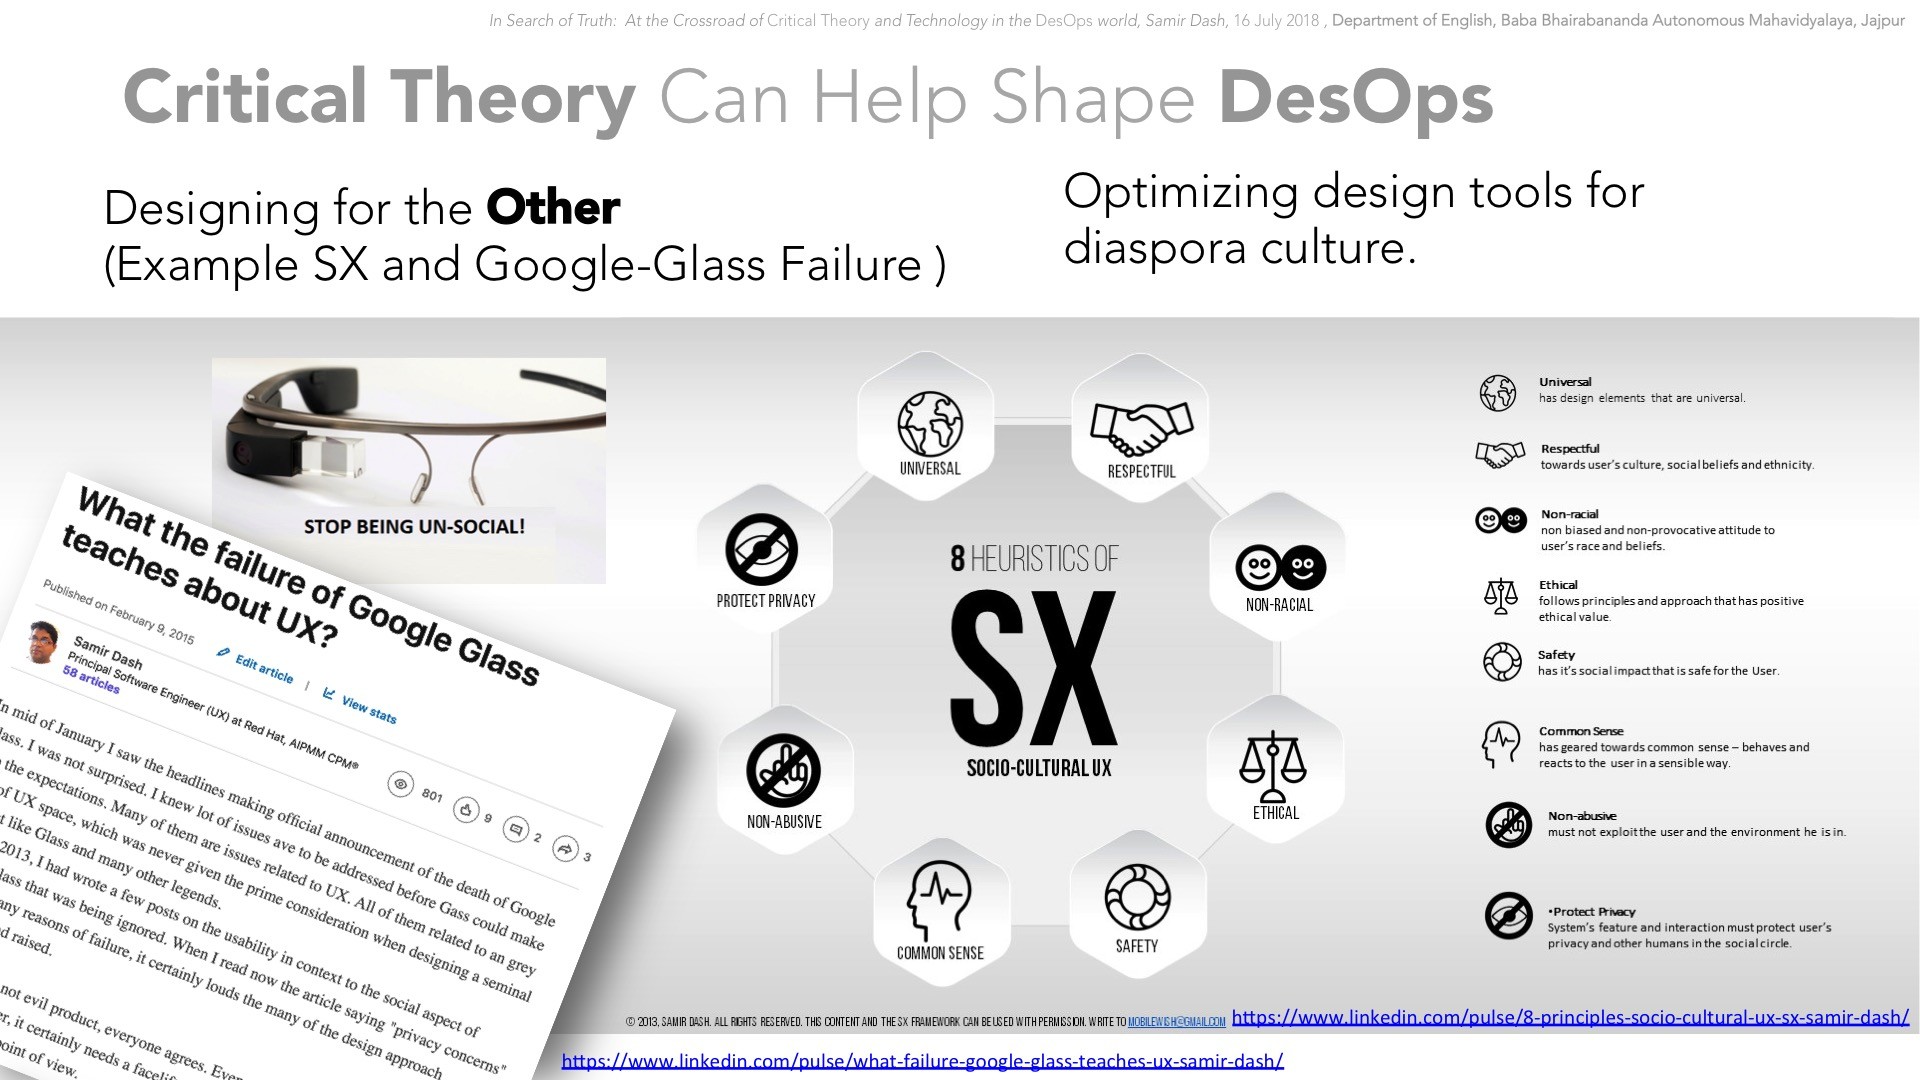
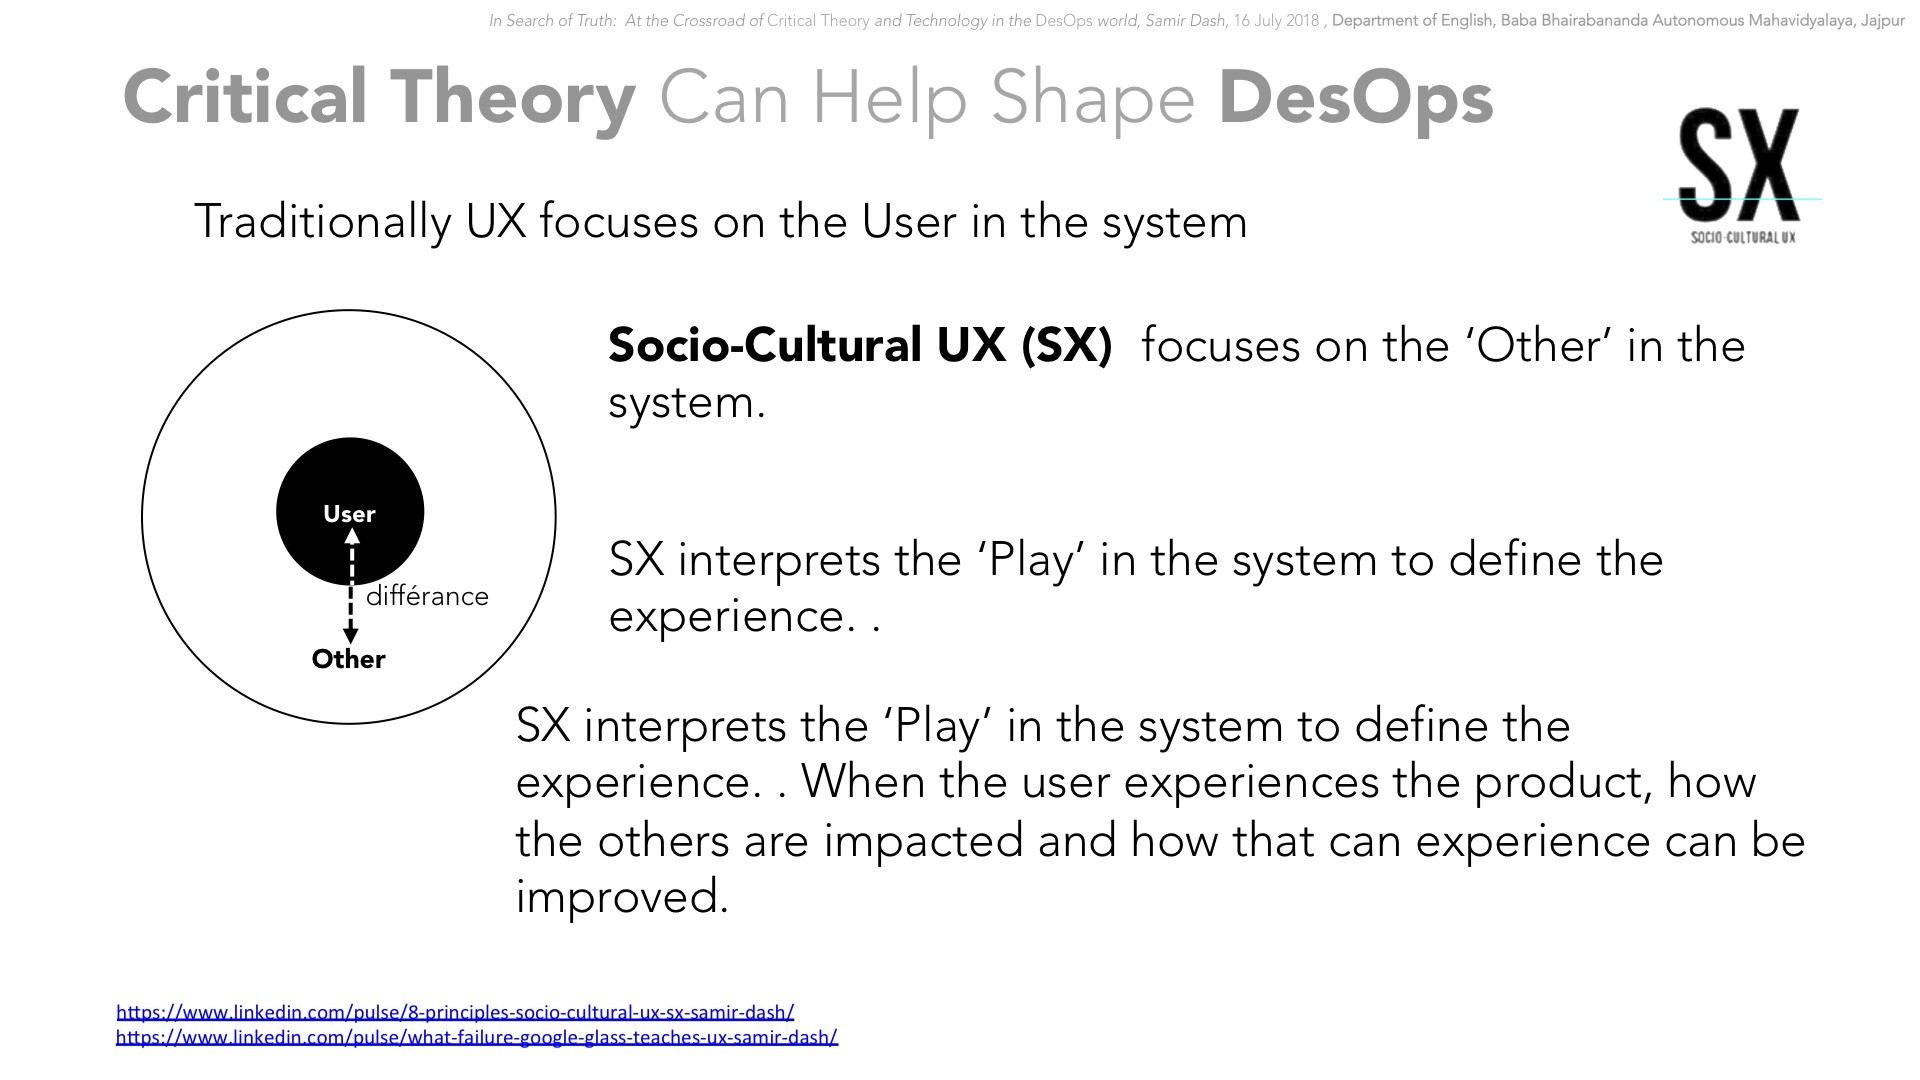
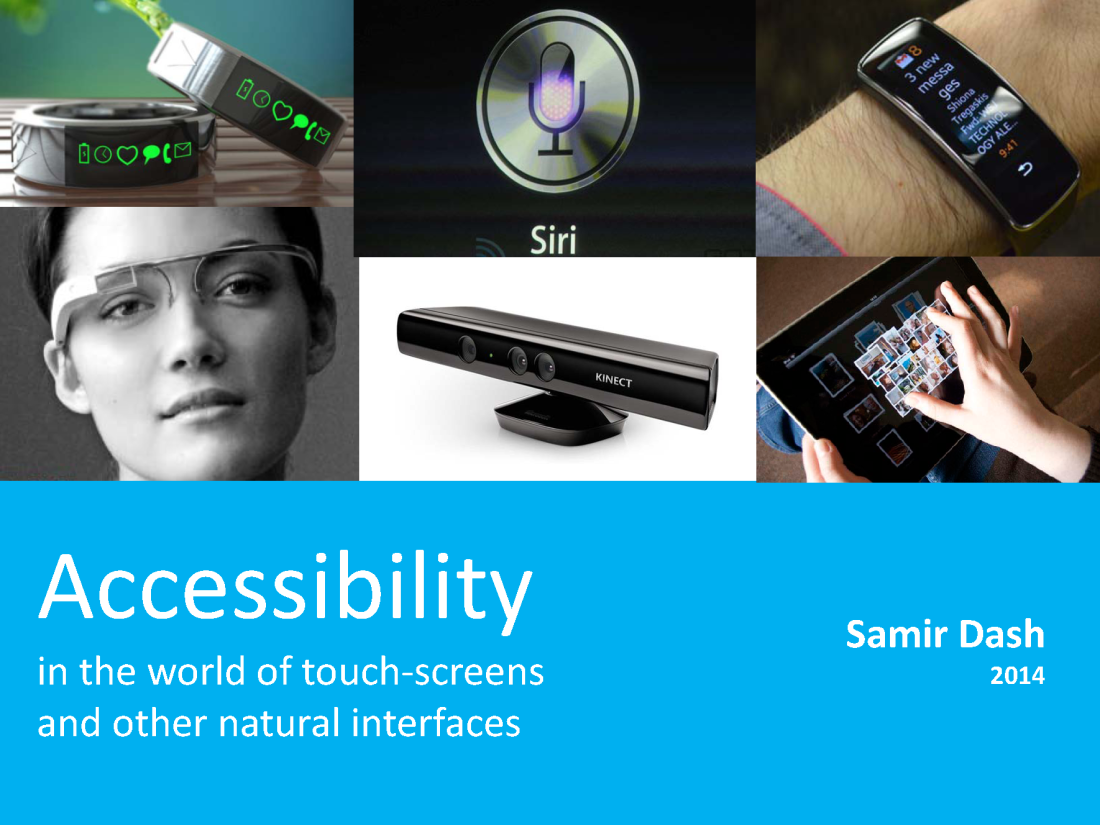
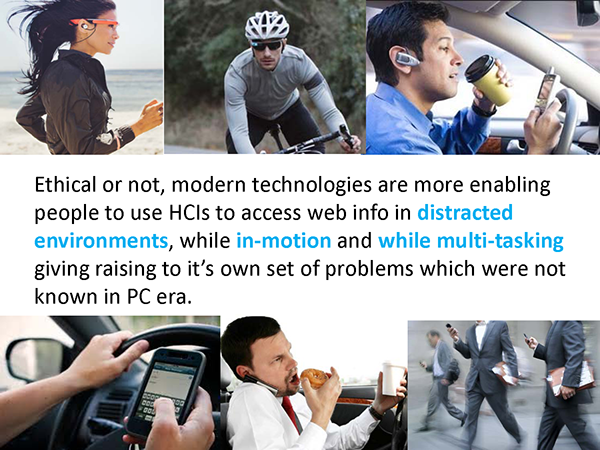
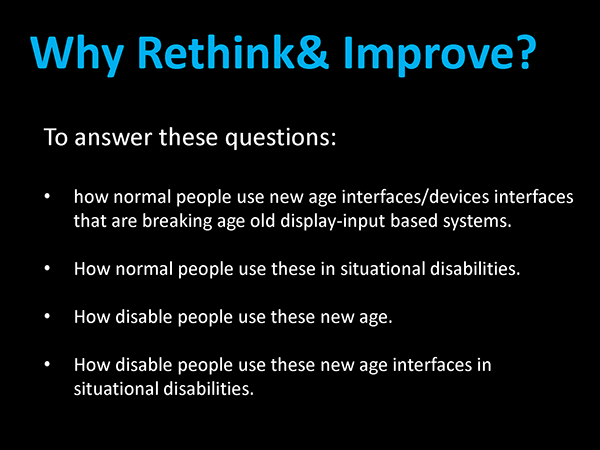
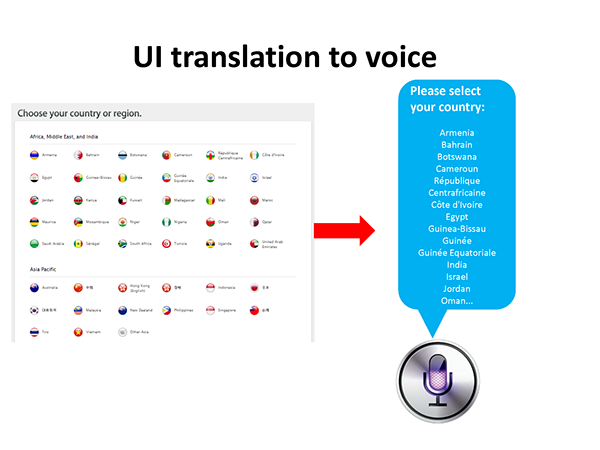
In today’s ever changing world if we need to reimagine the next generation analytics platform for retail and e-commerce market, what it will look like? Well I gave it a go . Following is a conceptual framework (I call it “MakingSense”) and a business case for an IoT based real time analytics framework for retail and FMCG market. The following post is presented as a real life business case:
Overview:
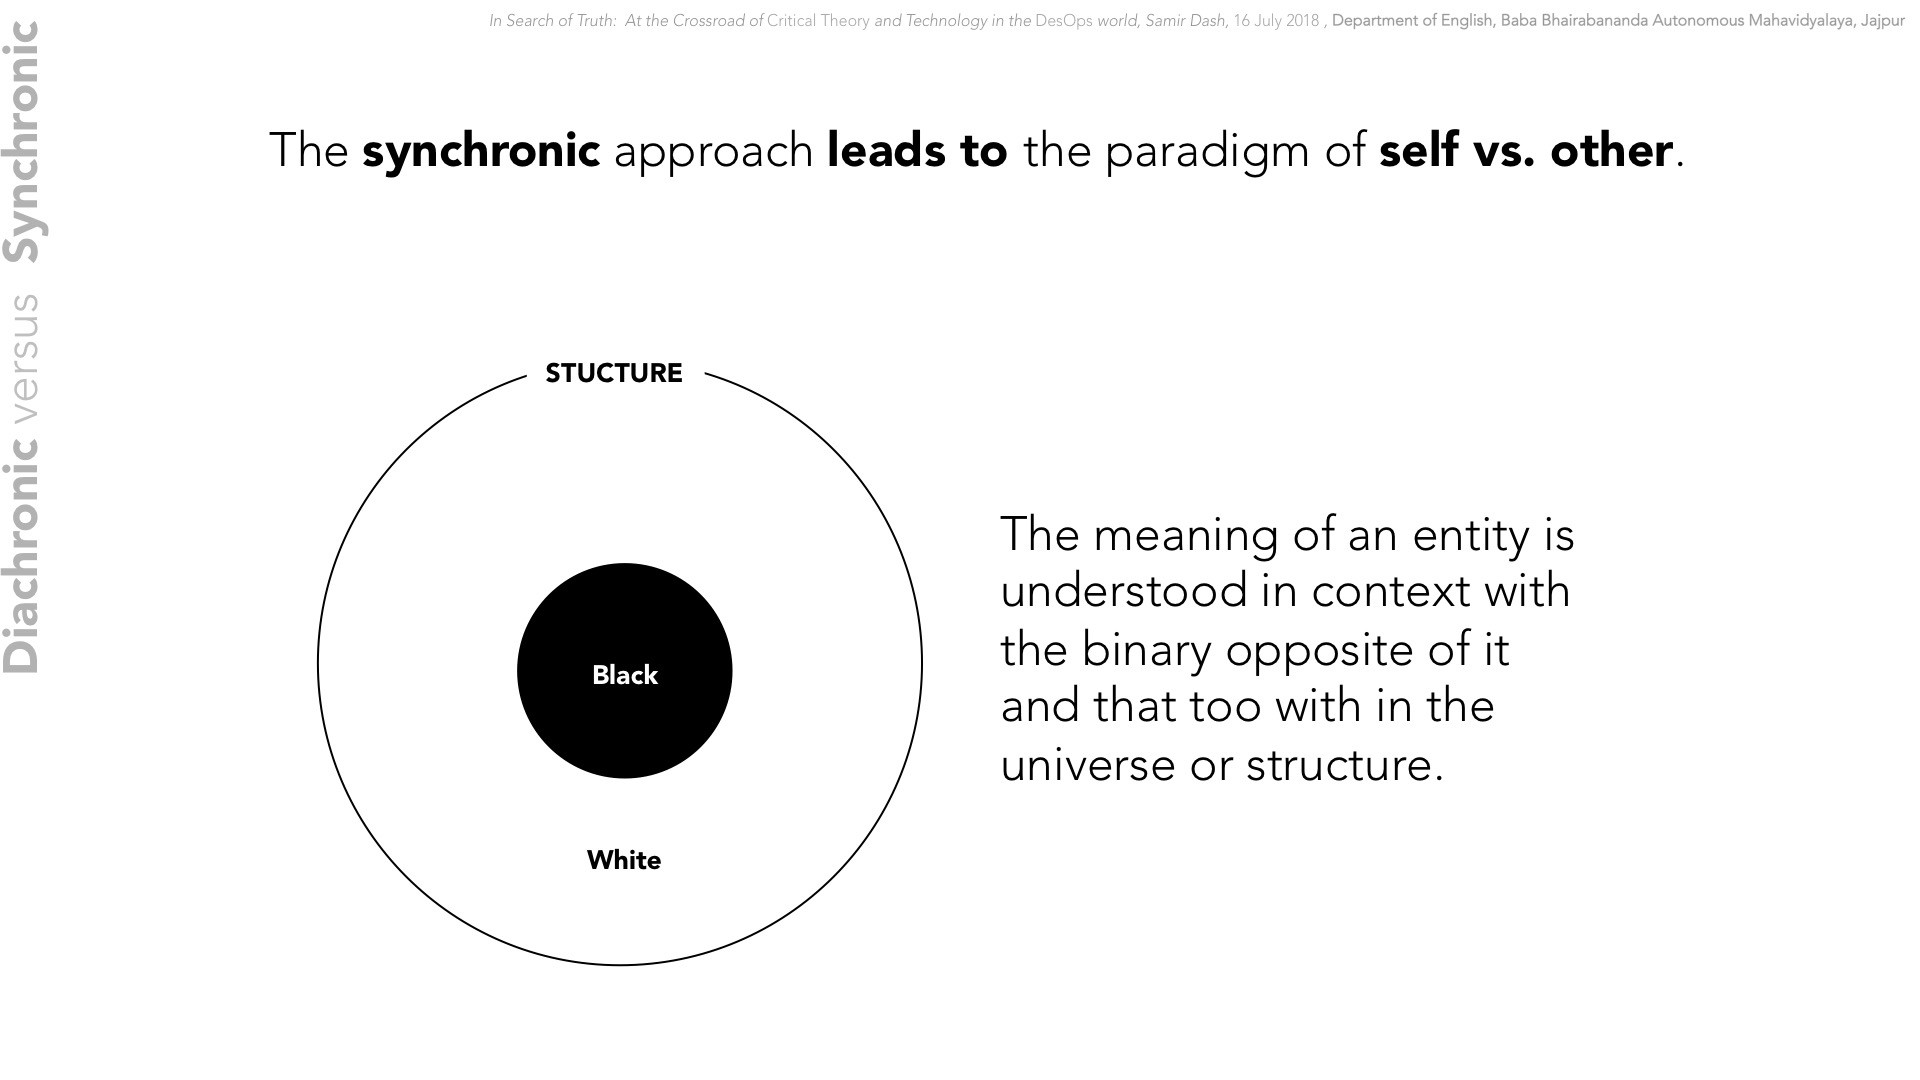
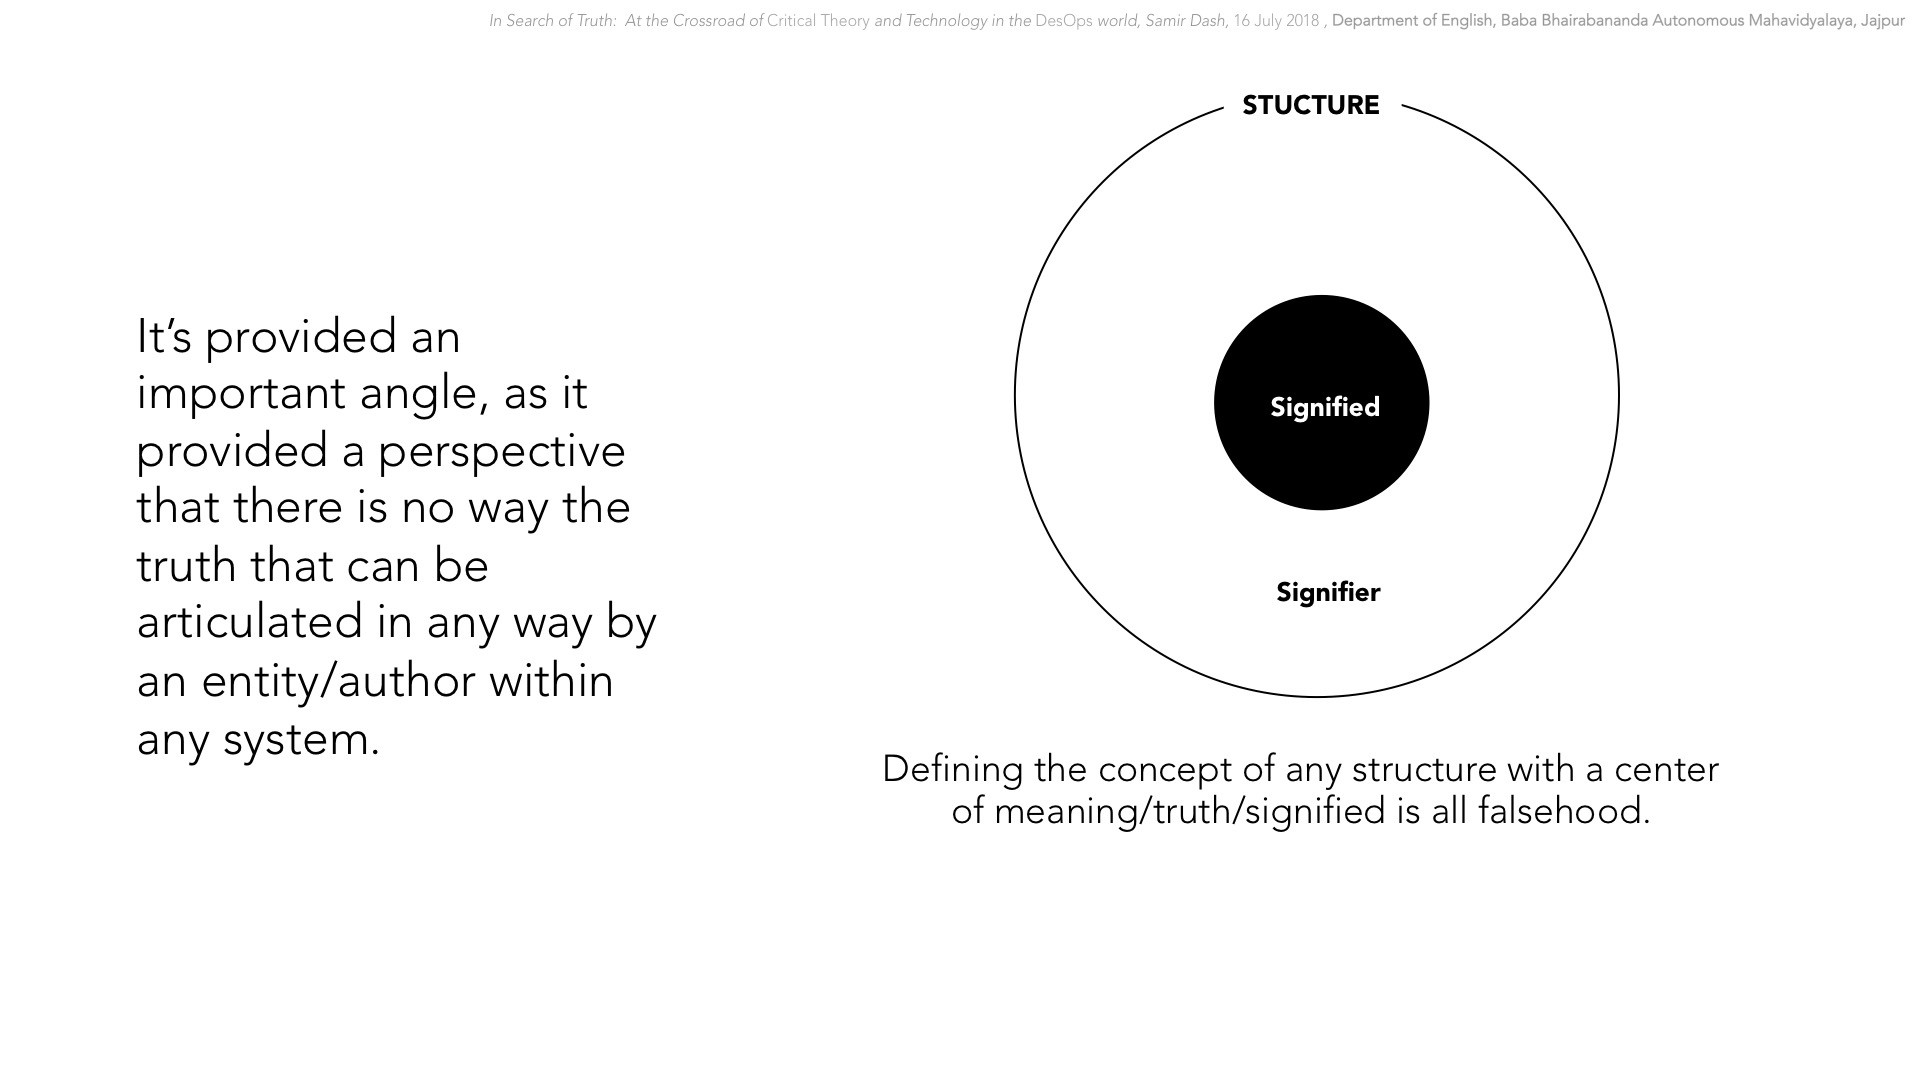
“MakingSense” is IoT based market analytics platform to connect all goods and products (specially non-digital goods) that behave as fast moving goods to the cloud-analytics to get real-time market insights to make the required course correction for the market strategy and business decisions for the product manufacturers and retail chains. This enables a direct feedback model between the consumers with the producers and sellers.
The problem it solves:
As per current market trends, even high-tech goods like mobiles, digital accessories are behaving like FMCG in market. Rapid change is evident in consumer behaviour due to influence from technology, economy and changing buying power of the consumer . Speedy ‘go-to-market’ approach in the market from players in the market has increased the competition. Many local and niche competitors are giving tough challenges to bigger players in all segments, specially in emerging markets. For globl players the typical market strategy is not working in expected way. Traditional approach of market insights collection is not sufficient to apply the necessary check and balance for market plans in real time.
The 4 core needs that Making Sense will address are:
1.The manufacturers need market insights in real time
2.The consumer behaviour towards tech-goods is also needs to be tracked in real time to ensure how close they are behaving to the FMCG market behaviour.
3.In retail and non-tech sector the real time insights are needed for goods that are not digitally connected to analytics eco-system
4.Need to look beyond the traditional field immersions, surveys to get micro-insights for course corrections in strategy.
The solution and the business model:
The “MakingSense” platform will help product manufactures and retailers in gathering real time customer insights even for non-digital goods and helps adjust the customer retention dynamics . In retail and non-tech sector the real time insights are needed for goods that are not digitally connected to analytics eco-system. Need to look beyond the traditional field immersions, surveys to get micro-insights for course corrections in strategy.
The platform has self sustainable business model that will make it grow though benefiting the product manufacturers, retailers and the consumers. The final envisioned eco-system will have a big-data enabled management module in cloud, a super easy to use dashboard system for product manufacturers, retailers and consumers and mobile apps and easy integration public APIs along with one SMS enabled gateway.
The producers and sellers can register their products to generate specific code to their products category and if required can use the APIs to map their existing bar-code systems. The normal consumer can register themselves to generate the reward points and to be used directly in the registered retail chains or can redeem for some gifts from their dashboard itself.
The eco-system will allow the product companies and sellers to get real time analytics through creating data points directly.
Triple advantage benefits for consumers:
The incentivise/rewarding consumers for their feedback is what will make it more successful.
Whether the product the consumer gives feedback on is purchased from the registered retailer or not, he is definitely getting the reward points or freebies from the site.
If he purchases the product from the registered retailers, then he is getting additional discounts or reward points.
On top of it if the product manufacturer registers, then the customer is getting more discounts!
It’s a triple advantage for the customer.
Now, this is a new strategy where the customer is prompted to buy the product from specific manufacturer, from a specific retailers toget advantage of this.
While the whole aim is to get feedback and analytics running, this model also induces a new competition on product manufacturers to provide discounts to bring down the final competitive price to retain customers at the same time the customer is also getting benefitted.
This model is disruptive in nature where every one is getting benefited :
Manufacturer and Retailers – reduction in market research spending , getting real time-analytics — the mood of the segment- customer retention strategy formulation , attract customer to their outlets and
Consumer — reduction in home budget, get incentive, rewards for their feedback.
::Idea::
The “MakingSense” platform will help product manufactures and retailers in gathering real time customer insights in real time even for non-digital goods. In retail and non-tech sector the real time insights are needed for goods that are not digitally connected to analytics eco-system. Need to look beyond the traditional field immersions, surveys to get micro-insights for course corrections in strategy.
The platform has self sustainable business model that will make it grow though benefiting the product manufacturers, retailers and the consumers. The final envisioned eco-system will have a big-data enabled management module in cloud, a super easy to use dashboard system for product manufacturers, retailers and consumers and mobile apps and easy integration public APIs along with one SMS enabled gateway.
The producers and sellers can register their products to generate specific code to their products category and if required can use the APIs to map their existing bar-code systems. The normal consumer can register themselves to generate the reward points and to be used directly in the registered retail chains or can redeem for some gifts from their dashboard itself.
The eco-system will allow the product companies and sellers to get real time analytics through creating data points directly
:: Architecture:
The idea is about building an eco-system in multiple-phases that will have three components:
1. “MakingSense SmartCloud” — Cloud based server to store the data related to the consumers and host the analytic platform. This will have the following major components :
i. BigData analytic-engine that can do the necessary data mining to understand trends and formulate recommendations .
ii. Open REST APIs providing easy way to integrate third-party systems such as retail-management systems, third-party analytic and business process tools/apps.
iii. user management modules with different levels of access to different roles.
iv. Reward points management and coupon code management system.
v. Payment gateway and subscription and vendor management.
2.”MakingSense Portal” — Web-based portal/ thin-client solution that will allow consumers and product sellers/retailers who can register and access their respective dashboards
3. “Making-Sense client” — This is primarily mobile/device client and consumer facing service gateways (and optionally hardware) that can be used by the consumers to submit their feedback.
In the multi-phased development roadmap, initially the mobile apps will be primary representative of this section. Later phases will introduce SMS enabled gateways, custom “MakingSense” hardware, which will be cheap yet provide easier way to share data from the consumer.
:: User Journeys:
For Sellers (Retailers/Producers)-
1. gets account registered at ‘MakingSense Portal’.
2. get API if to connect to their card scanners /billing machines/users db/inventory/product catalog
3. gets products mapped to “Reward points”/discounts/freebies
4. product manufacture can offer discounts for their product using the API by registring their product
5.product manufacture can register their product to get insight for their product across globe
6.retailers get insight for their retails chains –anything sold though their system
7.retailers can buy insights (not customer details ) for other regions/ segments
8. product manufacturers can buy insights (not customer details) for competing brands and similar products
For Consumer –
1. Registers at the Portal — if he is from a retailer’s database, he can map his account to this system.
2. Connection to his SNS account (facebook) is encouraged (with some additional reward for it)
2. downloads free “makingsense” mobile app, and starts using
3. scan the barcode of any product he purchased and rates the product.
4. For each feedback on different (at least different batch of same product with in a specific time period range) the products, gets “reward points” or discounts codes or freebies coupon codes.
5. If retailers/product manufacturer has sponsored rewards, based on accumulated points, he can redeem them at their store. Else these can be redeemed at the “makingSense” dashboard at the portal.
:: Benefit:
For Sellers (Retailers/Producers)-
emerging market is the next potential
even high tech/high end goods are behaving like FMCG goods…
micro -insights are required to plan the market startegy adjustment
conventional type of large scale survey’s are not going to help much due to high cost and field immersion efforts and time.. — go-to-market is accelerating so ..time has value … micromax makes a phone in 70 days
So new age trend is required to gather data in real time ..to connect goods that are not even digital , we need those data
IoT will help in rapidly accessing this.
They get the following insight from the solution:
customer’s insight
————
who bought
how many times bought
which part of the year bought the most
consumer’s insight
—————————
liked? great – good – bad ?
what else he likes in the same product line ?
what similar product he uses?
what similar product he likes most ? what brands?
collective consumer insights
—————————-
how many such buyers are in the region who are potential buyer?
how is collective preference?
predictive market forecast
—————————-
in which part of the year the product consumption is going to increase — manufacture more and ensure smooth shelf-space management
who are competitor brands
how a product is behaving in a segment?
value curve?
what should be the status?
if connects to his SNS account/FB/retail shopers card — then u get location, age, gender, type etc. — new gold mine where every one will want to invest.
For Consumer –
1. Consumer is rewarded for any feedback he shares for any product he uses.
2. Apart from regular discounts, reward points the customer can get these additional discounts in purchase/freebies which can bring customer delight leading to more involvement and customer engagement (so no matter if consumer does not buy from registered retailers or products.)
:: Business model::
Business model is mostly through subscription based to access competitor analytics
Along with it the access to premium data and value added services like (customizable report, goal alignment, market strategy etc. ) can be a major source of revenue .
retailers get 100% discounts to access their data — all real time
retailers get 20-30% discount in viewing their competitor’s data in the same region or segment
retailers not listed in the program to have to pay full to get data for a segment
retailers not listed in the program can not view their data
consumer gets 2% bonus discounts or points to submit the feedback on every item he uses
:: Market Size::
As per ESOMAR Global Market Research conducted in 2011:
Global Spending on Market Research is 32 Billion USD.
Out of this Emerging Market share is 24% == 8 Billion USD
Out of this only Asia Pacific spending is == 5 Billion USD.
India & China are major share holders of 5 Billion USD
India == 40% of 5 Billion USD = 2 Billion USD
Based this 1st year
target in five 1st tier cities.
assuming 30% investment is done in these 5 cities == 0.6 Billion USD
assuming we get 30% of this share in 1st year == 0.2 Billion USD
That results in 100 Cr INR Revenue in 1st year .
:: Potential competitors & Competitive advantage of the idea::
Amazon Dash
Dash is a product by Amazon that allows to facilitate the consumer to order new products from Amazon store
Dash:
Hardware based + amazon portal is available for consumer to buy
Only limited to Amamzon portal
No-whitelabelled system — Amamzon uses it for it’s own usage.
It’s is NOT a feedback based model, the bigdata only shows which segment is purchasing which product.
Making Sense:
Special marketing-insight platform – unique and first of it’s kind.
Specially designed to handle multiple vendors, retailers and consumers along with reward points/incentive management model .
Unique analytics with predictive strategy formation
works across cross platform, outlets, cross multi-channecommercialal platforms both counter based or online.
SWOT Analysis
Strength:
Cross platform – mobile, tablet, PC, kosk, custom hardware
works across cross platform, outlets, cross multi-channel commerceial platforms both counter based or online.
Can appeal to consumers, retailer, manufacturers
Can be scaled from FMCG to insurance, banking/finance sectors.
Weakness:
New concept, new to the market — disruptive business model for market research where customers are incentivised for their feedback directly.
Requires fund to maintain the incentives/ rewards for the end-consumers.
Large scale imkplementation can bring meaningful results??????
Opportunities:
New unique business model.
Regional market is drib\ven by fragmented retail / distribution channels
Specially FMCG market is highly un-organised
Penetration of single super markets, and online selling is low.
Specially in India the coverage of super markets (Big Baazar, )
Market insights
Threats:
Dash making it’s platform focused on marketing research
Marketing research companies replicating this model– alternative models
Retail chains making their own platform — will get limited view only only their customers..still they need to spend more in their marketing agencies.
:: Why it’s a killer Idea? ::
The incentivise/rewarding consumers for their feedback is what will make it more successful.
Whether the product the consumer gives feedback on is purchased from the registered retailer or not, he is definitely getting the reward points or freebies from the site.
If he purchases the product from the registered retailers, then he is getting additional discounts or reward points.
On top of it if the product manufacturer registers, then the customer is getting more discounts!
It’s a tripple advantage for the customer.
Now, this is a new strategy where the customer is prompted to buy the product from specific manufacturer, from a specific retailers toget advantage of this.
While the whole aim is to get feedback and analytics running, this model also induces a new competition on product manufacturers to provide discounts to bring down the final competitive price to retain customers at the same time the customer is also getting benefitted.
This model is disruptive in nature where every one is getting benefited :
Manufacturer and Retailers – reduction in market research spending , gettingf realtime analytics — the mood of the segment- customer retaintion strategy formulation , attaract customer to their outlets and
Consumer — reduction in home budghet, get incentive, rewards for their feedback.
As per Tim Ambler of London Business School, “Marketing Productivity” is measured through the following 5 ponts :
1. routinely research consumer beavior?
2. routinely report research with financial matrics?
3. compare results with previously forecasted in business plans
4. compare with level achieved by your competitor using the same indicators?
5. adjust short term performance?
All of these are taken care in the blue print of “MakingSense”


![UX Simplified: Models & Methodologies: Digital Edition [Kindle Edition] ISBN: 978-1-3115-9110-4](https://samirshomepage.files.wordpress.com/2014/07/untitled-2.jpg?w=1100)